A workfile that contain the objects that are being appraised along with comparables.
WorkfileScreen Details
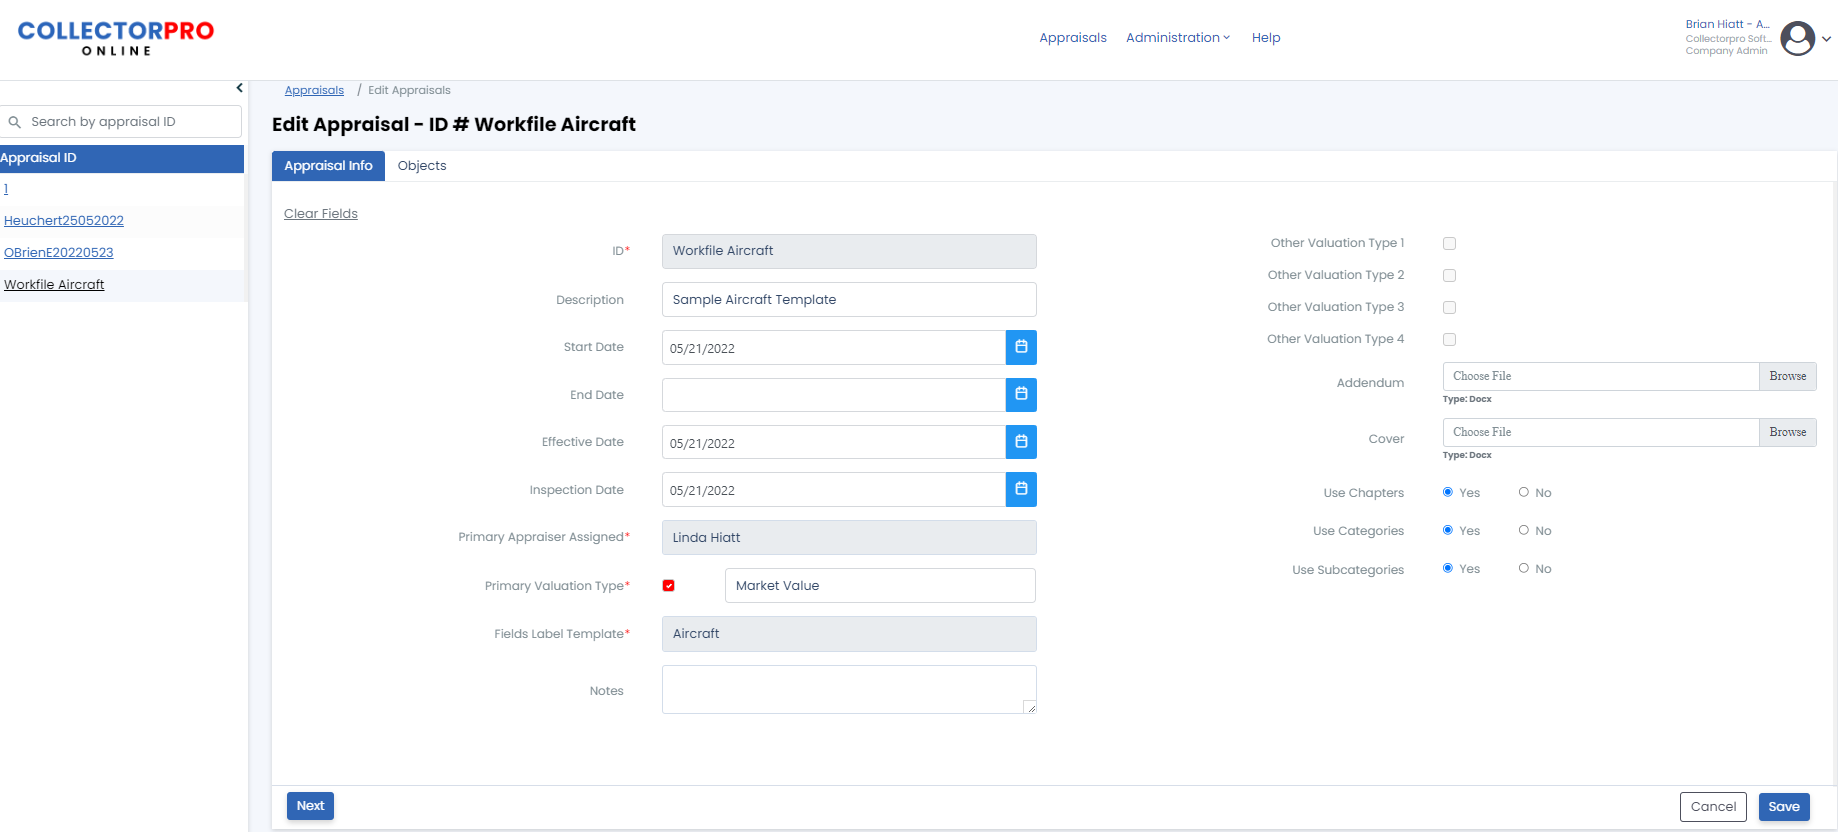
Workfile List – On the left side of the workfile screen is a list of all appraisals. You may click on the workfile ID to open another appraisal. You can collapse the workfile list by clicking the arrow pointing left near the top. You can also search for a workfile by typing the search term in the Search by workfile ID field.
ID Field– This is the appraisal ID you assign to the workfile. It must be a unique ID containing only alphanumeric values
Description – Short description of the workfile.
Start Date – Enter or select the start date of the workfile.
End Date – Enter or select the end date of the workfile.
Start Date – Enter or select the effective date of the workfile.
Inspection Date – Enter or select the inspection date of the workfile.
Primary Appraiser Assigned – Select the primary appraiser assigned to this workfile. This is usually the appraiser that will be signing the appraisal report.
Primary Valuation Type – Check the box to use this valuation and type in the valuation type, Ie. Fair Market Value.
Other Valuation Types 1 -4 – You may assign up to 5 valuations to each object. Click the checkbox next to the one you wish to use and enter the valuation type.
Field Labels Template – CollectorproOnline has several predefined field label types. Selecting the field label type will adjust the object field labels. See Field Label Template for more details. Select User Defined to set the object field labels to your own custom values. Field labels apply to every object in the appraisal. If you select User Defined, you can set the field labels on the Add Object screen using the Edit Field Labels link when adding the first object. This only needs to be done once to apply to all objects.
Notes – Enter any notes about the workfile. These are private and do not show on the appraisal report.
Addendum – Click the browse button to upload a Word document containing your appraisal report addendums. This document will be appended to the end of the report.
Cover – Click the browse button to upload a Word document containing your appraisal cover document. This document will be appended to the beginning of the report.
Use Chapters – Select Yes to assign Chapters on the objects on this report. Chapters are setup in the Administration area.
Use Categories – Select Yes to assign Categories on the objects on this report. Categories are setup in the Administration area.
Use SubCategories – Select Yes to assign SubCategories on the objects on this report. SubCategories are setup in the Administration area.
Note :Chapters, Categories, and Subcategories, if used, will create a report section with summary totals for each.
Workfile List Heading Checkbox – Checking this box will select all appraisals in the current list and present an option to delete the selected appraisals. This is useful to delete multiple appraisals at the same time.
Create workfile Button – Use this button to start a new workfile.
Download Report Button – Use this button to create and download the report to a Word document format. See the Report topic for more information.
Save Button – Click this button to save the appraisal information and return to the appraisal list.
Objects Tab – Click this tab to add, edit, or delete objects on the active workfile. See the Objects topic for more information.
Notes:
An asterisk indicates a required fields.